Monday, November 12, 2012

Happy Diwali

Hope you have been preparing a lot of sweets and snacks for Diwali!! This year I couldn't find time to make any thing special for Diwali. Just made some simple snacks over the past two weeks. 

Fortunately, we get a lot of good snacks flown from India to Singapore! We didn't have this luxury before, but now I see Adayar Anandha Bhavan, Grand Sweets, Haldirams Snacks all over the city! Last weekend we bought sweets from Adayar Anandha Bhavan and Haldirams. I love Sree Mithai ladoos back in Chennai. So I was a bit skeptical when buying Haldiram's Ladoos. But they were perfect! I love them. (seen in the pic below).

So have a fun filled Diwali. And be mindful of the noise pollution, and make sure to clean up after all the crackers! God Bless!

NOTE: The ladoos are from Haldiram's.

Thursday, November 1, 2012

Whole-Wheat Bread


Seems like a long time since my last post. I have been busy with a lot of stuff at home lately. But I am still trying out new recipes, just couldn’t find time to post them online.

I am so bored with the store bought ‘wholemeal’ bread. When you read the ingredients list printed on these breads packages, you can notice that white flour still has the major percentage than the whole-wheat flour.  I also like my bread with a bit of chewy texture. Believe it or not, I hate white bread!! I know most of you out there remain sceptics when it comes to brown bread, but you have to give it a try, I promise you will start to love it! Brown bread has so many layers of rich flavour and texture, which you cannot get in a plain white loaf!! Previously I have been successful in converting a lot of my friends to switch from white bread to wholemeal!! And I hope after reading this post, more of you join this fab guilt free option.
Baking with yeast is not my forte, I tried two recipes before with no good results. But this recipe is from www.annies-eats.com seemed easy enough. I agree making homemade bread seems too much of a work. But the result is so worth it. I won’t be baking this every week, but it will be a nice switch once in a while from the god awful NTUC 
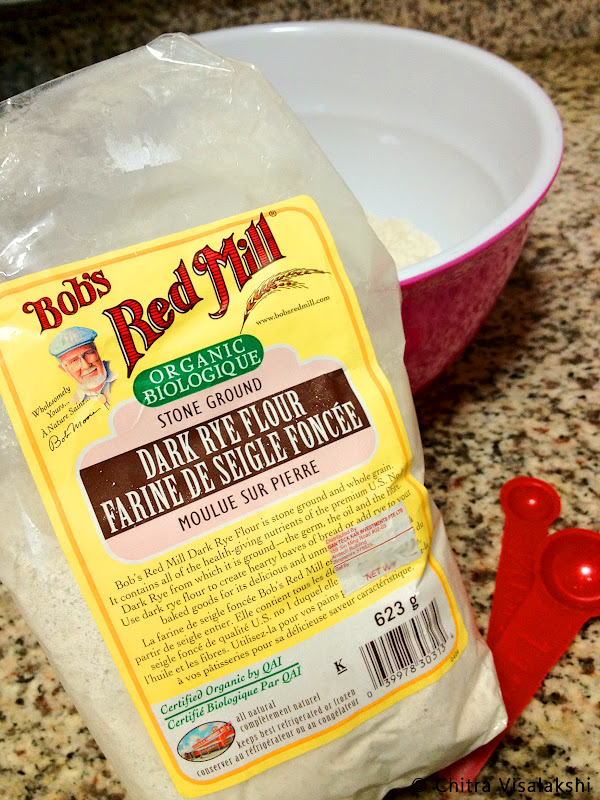
wholemeal bread.  FYI I tried dark rye bread from Giant a few times, and I love it.

The dough doubled in volume after 1 hour.

Dough in pan, doubled in volume after 30 minutes.
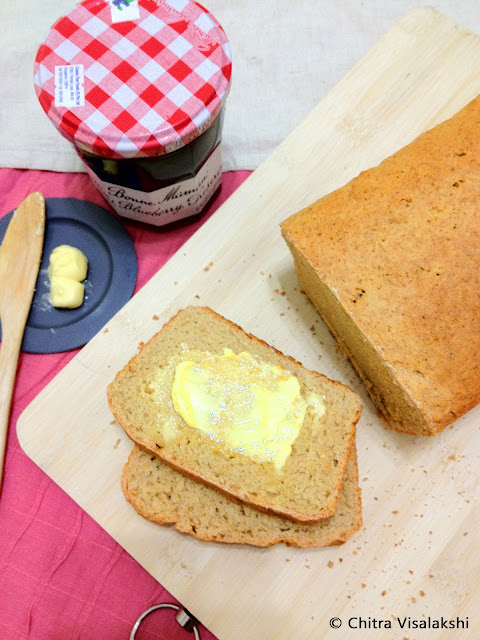
Whole-Wheat Bread
Yields: Two 9-inch loaves
Ingredients:
2+1/3Cups– Warm Water (around 100°)
1 ½ tablespoon – Instant Yeast
¼ cup – Honey
4 tablespoon – Unsalted Butter, melted
2 ½ teaspoon – Salt
¼ cup – Rye Flour
½ cup – Toasted Wheat Germ* (Toasted the wheat germ in a dry pan on the stove)
3 cups – Whole-wheat Flour (I used Aashirvaad Atta)
2 ¾ cups – Unbleached All-Purpose Flour (I used Plain Flour)

*Wheat Germ - The germ of wheat is the reproductive part of the seed that germinates to grow into a plant. Removal of bran is aimed at producing flour with a white rather than a brown colour, and eliminating fibre.
 Wheat germ is a concentrated source of several essential nutrients including Vitamin E, folic acid, phosphorus, thiamin, zinc and magnesium. It is a good source of fibre.  White bread is made using flour that has had the germ and bran removed. Wheat germ can be added to protein shakes, casseroles, muffins, pancakes, cereals, yogurt, smoothies, cookies, and other goods. 

 Directions: 
  • In a bowl, mix the water,yeast,honey,butter and salt with a rubber spatula.
  • Mix in the rye flour, wheat germ, and 1 cup of the whole-wheat and all-pupose flour.
  • Add the remaining whole-wheat and all-pupose flour, attach the dough hook and knead at low speed until the dough I smooth and elastic, about 8 minutes. (If you don’t have a dough hook, then use your hands to knead).
  • Transfer the dough to a lightly foured surface and knead the dough for another 30 seconds, until it is soft and smooth.
  • Lightly oil a large bowl, place the dough inside and cover with plastic wrap or a moist towel.
  • Let it rise in a warm area until the dough has doubled in volume, about 1 hour.
  • Heat the oven to 190° C.
  • Gently press down the dough and divide it into two equal pieces.
  • Gently press each piece into a rectangle about 1-inch thick and 9 inches long. Roll the dough formly into a cylinder, pressing down to make sure the dough sticks to itself.
  • Turn the dough seam side up and pinch it closed
  • Place the cylinder of dough into a greased 9 X 5 inch loaf pan, seam side down, pressing the dough gently so it touches all sides of the pan.
  • Cover the pan, and let it rise for 20-30 minutes, until the dough has doubled in volume.
  • Bake for 35-45 minutes.
  • Transfer the bread immediately from the baking pans to a wire rack to cool.


Monday, September 24, 2012

Condensed Milk Chocolate Pedas


I love Indian sweets. Unfortunately in Singapore, the so called Indian sweets are a bad concoction of food colouring and sugar! But I have to say some of our sweets are soo tedious to make, and it takes many trials to get it just right. There was this one time I tried hot jalebi, it was so much work, and at the end of two hours it turned out to be soggy!
  So here is a quick and easy recipe to help you through your sugar craving moments, and it gets better with an added touch of chocolate! This recipe was adapted from Niya’s World
Condensed Milk Chocolate Pedas:
Makes  18 pedas.

Ingredients: 
  • 2 teaspoon – butter/ghee
  • 1 tin (400 g) – Milkmaid Condensed Milk*
  • 1 Tablespoon – Cocoa Powder
  • 2 tablespoon – Sugar
  • 2 teaspoon – more ghee
*I used Evaporated milk for a richer taste. 


Cooking the milk and cocoa mixture,
stirring continuously.
Directions:
  • Grease a steel/glass plate with a little bit of ghee/butter.
  • In a non-stick pan, heat the 2 teaspoons of butter/ghee, on a medium flame.
  • Add the condensed milk along with the cocoa powder and sugar. Mix well
  • Stir continuously for 20-22 minutes on a low flame, or until the mixtures thickens and leaves the sides of the pan.
  • Pour the cooked mixture into the greased steel/glass plate and keep aside to cool completely, about half an hour.
  • Apply the remaining ghee on both palms and shape the cooled mixture into small balls/pedas.
  • Garnish with slivered almonds or cashews.
  • Store in the refrigerator,  for up to a week.


Tuesday, September 11, 2012

Fluffy Blueberry Lemon Cookies


Sorry I have been away for so long. Went to India a while back, and I still haven’t gotten back to blogging. Last week, I picked out these lovely blueberries at the supermarket. Since they were in a really good condition, I wanted to try freezing them, for future.


I know all of us are new to SOFT cookies. I was a bit worried as to the texture of the cookies. When I baked them, it was a bit crisp, but after a few hours it became so soft, almost like cupcake tops! This is a new texture of cookies, I enjoyed the fluffiness and the zingy taste from the lemons. I love blueberries, so this was a win win recipe for me!


Cookie dough ready to be refrigerated.
The green specs seen are the lemon zest.
I had saved this recipe for Blueberry lemon fluffy cookies a month back from http://bakerbettie.com/. And thought I would give it a try. I got a new zester from India during my recent trip. So this would be a perfect recipe to give my new zester a go, along with the frozen blueberries!

Spooned and flattened cookie dough.
You don’t have to have blueberries and lemons to make these, you can use the base recipe and make your own flavours, like chocolate chips, or even just plain vanilla. The cake flour mentioned in this recipe gives these cookies their fluffy texture. Cake flour has a low gluten content with allows the cookies to rise while baking.  

Frozen Blueberries
Thawed Blueberries
Blueberry and Lemon Cookies
Makes – 3 dozen cookies

Ingredients
1 cup - unsalted butter, softened
1 cup - sugar
2 - eggs, room temperature
2 tsp-  vanilla extract
Zest of one lemon
Juice of one lemon
1/2 tsp - salt
1/2 tsp - baking powder
1/2 tsp - baking soda
1/2 tsp - cinnamon
3 1/4 cups - cake flour*
1 1/2 cups – blueberries (frozen or fresh)

*NOTE: Cake flour has a lower gluten content than all-purpose flour and therefore creates a lighter and fluffier cookie. However, you can sub all-purpose flour.  Decrease the amount of flour to 3 cups minus 2 tbsp.  The cookie will still be tasty, but the texture will be slightly different.

Instructions
  • In a bowl, beat the butter and sugar until light and fluffy.  
  • Add the eggs one at a time, and beat after each addition.  
  • Add the vanilla, lemon zest and lemon juice and beat to incorporate.  
  • In another bowl, whisk together the dry ingredients.  
  • Slowly add the dry ingredients into the batter.  
  • Scrape down the bowl as needed and mix until incorporated.  
  • Fold in the blueberries gently as to now break them.  
  • Allow the dough to cool in the refrigerator for at least an hour or up to overnight.  
  • Preheat oven to 350 degrees.  
  • Use a small scoop (about 1 tbsp size) and place rounded mounds of dough on a cookie sheet lined with Butter paper, And flatten the round mounds slightly.  
  • Bake for 14-16 minutes until the bottoms look slightly browned (the edges should not brown).
Enjoy this pillowy soft and fluffy blueberry and lemon cookies. So unique and delicious! Perfect with your morning cup of coffee.  


Thursday, July 5, 2012

Pumpkin Halwa


Last year when we were in India, we visited one of hubby’s Uncle’s place near Oooty,Tamilnadu. We had a wonderful time with the uncle and aunt! His aunt is an amazing cook. The entire week that we spent there, she made so many delicious dishes. I had made note of most of them, and finally now stumbled up her recipe for Carrot Halwa.
I passed this recipe to a few of my friends already, and it has been a hit so far. So I decided that it was high time that I gave the recipe a try. I made a variation of the recipe by trying it out with pumpkin, and also because I bought a huge one the other day and didn’t know what to do with it ;)

Deseeded pumpkin, ready to be cut and grated. 
Grated pumpkin being sauteed in ghee.
The halwa was so rich and melt in your mouth delicious. So give this easy dessert a try for your next for your dinner party.

Pumpkin Halwa
Serves: 3

Ingredients:
2 tablespoon - ghee
300 g (net weight after grating) - grated pumpkin
150 ml - milk
150 g - sugar
1/4 teaspoon - cardamom powder
1 pinch - nutmeg powder
2 tablespoon – ground almonds (optional)
1 tablespoon - cashew nuts, split
1 tablespoon - raisins
1 tablespoon - ghee ( to fry cashew nuts & raisins )

Directions:
  • Heat ghee in a wide pan.
  • Add grated pumpkin and stir for 8 minutes on a medium heat.
  • Add milk, cover with a lid and cook on low heat till the pumpkin absorbs the milk and pumpkin mixture dries up (approximately 15 minutes).
  • Add cardamom powder, nutmeg powder, ground almonds and sugar. Mix well.
  • Cook again on a low heat for another 10 minutes till the sugar well blended with pumpkin mixture and thickens / dries up.
  • Heat 1 tablespoon ghee, and shallow fry cashew nuts and raisins separately on a low heat till golden color.
  • Garnish with fried cashew nuts and raisins.


Tuesday, July 3, 2012

Apple Cupcakes

These cupcakes were a result of an impromptu baking session with friends. This Monday was a school holiday, and hence one of our friends  visited us during the week with her hubby and her two cute daughters. She and her girls were very interested in baking, so I thought I could make a batch of apple cupcakes for them. I also invited one of my neighbour and her daughter to join us for dinner. It was so much fun preparing dinner and baking and chatting away with everyone.


The kids were so eager to help me with the baking. The oldest was the one doing all the mixing and filling the batter in cups, while the younger ones were too busy waiting for the cupcakes to finish baking. We added colored sprinkles in shapes of cows and dinosaurs, on some of the cupcakes as per request :) I decided not to make any frosting for the cakes, so as to avoid unnecessary sugar for the kids.


The cupcakes were very moist and rich, not too sweet. The 1 cup of grated apple that I added was not very distinct after baking. Maybe next time I could try with 1 ½ cups. I also added some orange essence to give a refreshing taste to the cakes. If your prefer you can replace the 1 teaspoon orange essence + 2 tablespoon milk with 2 tablespoon fresh orange juice. This recipe is adapted from Baked Perfection.

Apple Cupcakes
http://chitra-frommykitchen.blogspot.sg/
makes 12 cupcakes

Ingredients:
1 1/2 cups - all-purpose flour
2 teaspoons - baking powder
1/2 teaspoon - salt
2 - eggs
1/2 cup - sugar
1/2 cup - brown sugar
2 tablespoons - milk
1 teaspoons - vanilla extract
1 teaspoon - orange essence
1/2 cup - vegetable oil
1 1/2 cups - grated apple

Directions:
  • Preheat oven to 350 degrees Fahrenheit. Grease or line a 12 cup muffin pan.
  • In a large bowl swift together the flour, baking powder, and salt.
  • In a separate bowl, beat together the eggs and sugars until creamy.
  • Beat in the milk, vanilla, orange essence and vegetable oil.
  • Slowly add the flour mixture, mix until just combined.
  • Stir in the grated apples.
  • Bake 20-25 minutes until a toothpick inserted into the center comes out clean. 

Friday, June 29, 2012

Oatmeal Crackers


This post has been long overdue. I went to India for a short visit, so I couldn’t post this recipe sooner.
I wanted to make a healthy snack for hubby. So I researched and found a good recipe for oatmeal crackers in The Great Scandinavian Baking Book by Beatrice Ojakangas.


These crackers are full of toasty oat flavour and hearty. I had to roll the dough real thin to give a crispy snap to the crackers. The dough, made of rye flour and rolled oats, is quite stiff. So I spent a lot of energy rolling out the dough very thin.


The actual recipe calls for 2 table spoons cane sugar, but I prefer to omit the sugar and adding salt instead, and sprinkling more on top of the crackers. I cut out the crackers in small rectangles, but you can also use a cookie cutter to cut out desired shapes. Stored in an air tight container, these crackers last for weeks.


So for your next tea time snack, give the cookies a break and try an oatmeal cracker for a healthier choice.

Oatmeal Crackers:

Ingredients:
1/2 cup - Rolled Oats
½ cup+ 2 tablespoons - whole milk, heated just to boiling
2 tablespoon - room-temperature unsalted butter
2 tablespoons - natural cane sugar
1 1/2 teaspoons - baking powder
1 teaspoons - crushed anise seed - optional
1/4 teaspoon - fine grain sea salt
½ cup+ 2 tablespoon - Dark rye flour
3/4 cups - All-purpose flour, plus more for dusting
more salt for sprinkling


Directions:
  • In a large bowl combine the rolled oats and boiling milk. Let stand until cool.
  • To speed this up I placed the bowl in the freezer for about 35 minutes.
  • When cool, stir in the butter, sugar, baking powder, anise seed, salt, and rye flour.
  • Stir in the all-purpose flour, a bit at a time, until a stiff dough forms.
  • Turn out onto a counter top and knead until the dough comes together and is uniform.
  • Heat the oven to 425F / 245C.
  • Divide the dough into 2-3 parts, just so you have a manageable amount to work with.
  • Now, you're going to want to roll the dough out very thin - 1/8th-inch.
  • This way your crackers will have snap. Have a look at the photo up above, and try to get it thinner than that.
  • If your dough is at all stubborn, just let it rest there for ten minutes or so, then try again.
  • Transfer to a parchment-lined baking sheets, and sprinkle with a bit more salt - flaky salt if you have it. Use a fork to make a line of small holes on each cracker.
  • Bake for roughly 14 minutes.
  • When the cracker bottoms are deeply golden, roughly 9 minutes in, flip each cracker, and brown the flip side as well.
  • Use your best judgement and remove when well done.
  • Cool completely before storing in large air-tight jars.


Friday, June 15, 2012

Marbled Red-Velvet Cheesecake Brownies


This weekend, we are meeting some friends for dinner. One of them loves cakes and pastries. We used to attack the dessert table at buffets when we were on vacations. So I thought this would be a good opportunity to bake something new and pass it on to her and others.


I was a little nervous when I put these brownies inside the oven. But when I took the first bite, it was so good! I got out my cookie cutter and started cutting out cute little hearts! You could just cut small squares with a knife, but these hearts were too cute!

Pouring the cheesecake mixture on to the brownie layer.
All set with pretty swirls, ready to go into the oven...
Cutting out cute little hearts, with my pink sandwich cutter.
Marbled Red Velvet Cheesecake Brownies
Yield: 30 hearts  (2 inches)
http://chitra-frommykitchen.blogspot.sg/

Ingredients:
Red Velvet Layer:
1.5 cups + 2 tablespoon - Plain Flour
1 cup + 2 tablespoons - Sugar
1 1/2 tablespoons - Cocoa powder
1/2 teaspoon - Salt
1/2 teaspoon - Baking powder
1 1/2 - Eggs
1/2 cup - Sunflower oil
2 tablespoons - Milk, divided
2 teaspoons - Vanilla extract
1 teaspoon - Red food coloring
1 teaspoon - White  vinegar
Cheesecake Layer:
250 grams - Cream cheese, softened (I used one package of Philadelphia Block Cream Cheese)
1/4 + 2 tablespoons - Sugar
1 - Egg
1 teaspoon - Vanilla

Directions:
  • Preheat oven to 180C (350 degrees). Line a 9 x 9 baking pan with butter paper. See Notes below.
  • In large bowl, sift together flour, cocoa powder and baking powder. Add salt and sugar. Set aside.
  • In a mixing bowl, whisk together eggs, vegetable oil, 1 tablespoons milk, vanilla extract, red food coloring, and white vinegar.
  • Combine the dry and wet ingredients, until completely combined. Do not over mix.
  • The batter will be a really thick, but don't worry, that's what you want.
  • Remove 2 table spoons of the batter and place it in a separate bowl.
  • Whisk in the remaining 1 tablespoons of milk (into the 2 tablespoons of batter you just took out). Set aside.
  • Pour the remaining batter into the prepared baking pan. Using a spatula, smooth out the batter to reach all the edges.
  • Now, beat together cream cheese and sugar until fluffy, about 2-4 minutes.
  • Add eggs and vanilla, beating until combined and there are no lumps.
  • Pour the cream cheese mixture on top of the red velvet layer and smooth mixture till it reaches all the edges.
  • Drop spoonfuls of the remaining red velvet batter (that you mixed with milk) onto the top of the cheesecake layer.
  • Drag the tip of a knife through the red velvet and the cheesecake layers to create swirls.
  • Bake for 30 minutes, rotating half way through, or until a tooth pick inserted, comes out dry. 
  • Let cool completely on a wire rack before cutting.
  • Use a medium sized heart cookie cutter to create the perfect hearts. Or cut into squares. 

Note:
  • I used a glass Pyrex dish, 13” in diameter.
  • And I lined the glass dish with butter paper.
  • Because I was baking with a glass dish, I reduced the temperature to 325 degrees, and baked for 45 minutes. 


Tuesday, June 5, 2012

Spinach Pulav - with Brown Basmathi Rice


I got some brown basmathi rice a few weeks back. And I have been waiting to try it, so finally made some pulav for lunch. I didn’t have any coriander at hand, so decided to use fresh baby spinach and some capsicums to make this easy and tasty pulav.


Ingredients:

  • Brown Basmathi Rice - 1 and 1/4 cups (soak for 10 min)
  • Spinach – ¾ of a bunch,  chopped with the stems cut off
  • Onion – 1, cut lengthwise
  • Capsicum -1,  diced lenghtwise
  • Carrots -1 diced  into cubes
  • Potato - 1 dices in cubes 
  • Salt – 3-4tespoons

Grind together:

  • Garlic: 8 cloves
  • Dry red chilli - 9
  • Ginger-1/2 inch piece
  • Spinach - handful


Directions:

  • Heat 3 tablespoons oil/ghee in a pressure cooker.
  • Fry some cardamom, cinnamon stick, cloves and some bay leaf.
  • Then add the onions, carrots, capsicum, potato, peas.
  • Drain the soaked rice, and add to the cooker along with the veggies, and fry well.
  • Add ground paste, and fry for a few minutes. 
  • Now add the spinach leaves and salt.
  • Add 1 and 3/4 cups water. (Ratio 1 cup rice=1 ½ cups water)
  • Close the cooker, after the first whistke, pressure cook for 12 min in low flame.
  • Open the cooker, and mix the rice gently. Serve with yogurt raita.

Friday, May 25, 2012

Butter Cookies


In my last post about Vanilla-Bean Cupcakes, I mentioned butter cookies that I made for my friend in KL,Malaysia. Sorry it took me so long to blog this post. Finally got down to uploading the pics. These cookies were full of rich buttery deliciousness! I have made these cookies twice since, and they are super easy to whip up on short notice.


These cookies were simple and easy to make. I used my cookie press to make the shapes. A cookie press is a hollow tube fitted with a decorative nozzle at one end and a plunger at the other, to press the cookies directly onto the baking sheet.  Below is a picture of my cookie press, it came with 20 different nozzles.


I have had this cookie press for a long time now, don’t remember the last time I used it. So I was thinking of purging it. But decided to give it one more go. Thank god I made these cookies, now I LOVE my cookie press.  But if you don’t have a cookie press, just make small balls of dough and flatten it on the baking tray with a fork.


Butter Cookies
Adapted from Martha Stewart Living
Yield: Makes 3 dozen cookies

Ingredients:
  • ¾ cups unsalted butter
  • ½ cup sugar
  • 1 large egg yolk
  • 1 ¾ cups all-purpose flour
  • A pinch of salt
  • 1 tablespoon vanilla extract
  • Colored pearls for decoration

Directions
  • Heat oven to 350 degrees.
  • Sift the flour, and set aside.
  • In a large bowl, cream butter and sugar until light and fluffy.
  • Add the egg yolk,vanilla and salt. Beat well.
  • Add the flour in 3 additions, and mix until well incorporated.
  • Fill the cookie press with the dough, and press out the cookie shapes directly onto an ungreased baking sheet. Place the colored pearls on the cookies.
  • Bake for 10-15 minutes, until the cookies are lightly browned.
  • To ensure even baking, rotate the sheet halfway through the baking process.
  • Transfer to a wire rack, and let it cool. Store in an airtight container.


Tuesday, May 15, 2012

Vanilla Bean Cupcakes


A friend of mine from my undergrad years is living in KL, Malaysia. She has recently given birth to an adorable baby boy. So hubby and I went to visit her over the weekend. She loves my blog and all my recipes! So I wanted to bake some cookies and cupcakes for her and her hubby.


I tried out some Butter Cookies with my cookie press, recipe to be posted soon. And I also made some vanilla bean cupcakes. I have made vanilla cupcakes before, but this recipe from Annie’s Eats, called for actual vanilla pods! I happened to have bought some last week to make vanilla extract. And so I got started on my vanilla bean cupcakes with fresh vanilla pods!

Though the process, of mixing the batter is a bit time consuming than usual. I promise the end result is worth the few extra steps. The baked cupcakes were so fluffy like a cloud! They were so moist and soft, you could actually see little small black specks of vanilla in the cupcakes. My friend and her hubby loved these cupcakes!


For the frosting, I used block cream cheese, tinted with blue food colouring. I was actually going for a light blue colour, but since the cream cheese was “cream” in colour to begin with, the frosting just kept getting greener as I kept adding blue colouring! Sigh! Anyways maybe next time I will try some buttercream frosting.

I love those pretty pink flowers on top of the cream cheese. I searched all over Singapore, and got them from a baking goods store in Geylang, along with the pretty blue cupcake cases.


 Vanilla Bean Cupcakes

Ingredients:
3 cups - cake flour
1 tbsp. - baking powder
½ tsp. - salt
1 vanilla bean, split lengthwise
16 tbsp. - unsalted butter, at room temperature
2 cups - sugar
5 large eggs, at room temperature
1¼ cups - buttermilk, at room temperature
1 tbsp. - vanilla extract

Directions:
  • Preheat the oven to 350° F.  Line cupcake pans with paper liners.  Set aside.
  • In a medium mixing bowl, combine the cake flour, baking powder and salt.  Whisk together and set aside.  
  • Add the butter to the bowl of an electric mixer fitted with the paddle attachment.  
  • Scrape the vanilla bean seeds into the bowl of the mixer with the butter and discard the pod (or reserve for another use.)
  • Beat on medium-high speed for 3 minutes, until light and creamy in color.  Scrape down the sides of the bowl and beat for one more minute.
  • Add the sugar to the butter mixture, ¼ cup at a time, beating 1 minute after each addition.  
  • Mix in the eggs one at a time until incorporated.  Scrape down the sides of the bowl after each addition.  
  • Combine the buttermilk and the vanilla extract in a liquid measuring cup.  
  • With the mixer on low speed, add the dry ingredients alternately with the wet ingredients, beginning and ending with the dry ingredients and mixing just until incorporated.  
  • Scrape down the sides of the bowl and mix for 15 seconds longer.
  • Divide the batter between the prepared paper liners, filling each about 2/3 of the way full (you will likely have batter left over after filling 24 wells.)  
  • Bake 18-22 minutes, or until a toothpick inserted in the center comes out clean.  
  • Allow to cool in the pans 5-10 minutes, then transfer to a cooling rack to cool completely.  
  • Replace paper liners and bake remaining batter if desired.  Frost cooled cupcakes as desired.
  • Yield: approximately 30 cupcakes

Monday, May 7, 2012

Almond Bars


Made some delicious almond bars this weekend. Hubby was playing a cricket match with his team. And it went on for the whole weekend! So I was home all weekend working on my overdue craft orders.


On Sunday hubby’s team won the match! He mentioned during their lunch break, that they were in the finals and were about to win. So I wanted to make something for him to celebrate when he came home.

Almonds are his favourites! I have some wonderful almonds that my aunt brought from Malaysia. I wanted to make something special with those almonds. And hence these almond bars. 

The recipe called for flaked almonds,but I wanted to use the whole almonds that I had. So I soaked the whole almonds for a 3 hours in warm water, and then peeled the skin off. I cut the peeled almonds into thin slices. This is a time consuming project, and not really necessary, unless you have almonds at hand. Otherwise it is better to just buy some flaked almonds.


The super easy recipe is from http://www.aspoonfulofsugardesigns.com/. I loved how simple the recipe was. The almond bars were heaven! They were chewy, soft and super moist! The brown sugar and the slivers of almond gave the bars a deeper level of richness to them. Hubby loved it!


Ingredients:
Makes 8 big bars

1/4 cup - butter
1 cup - brown sugar
1 - egg
3 tablespoons - honey
3/4 cup - plain flour
1 teaspoon - baking powder
1/2 teaspoon - vanilla extract
1/3 cup - flaked almonds

Directions:

  • Heat oven to 180 degrees C (350 degrees F).
  • Line a square pan with baking paper.
  • Melt butter in a heat proof bowl, in the microwave for 30 seconds.
  • Add brown sugar and honey, and stir until well combined.
  • Stir in egg. Mix well.
  • Combine flour and baking powder, then stir into the mixture.
  • Add vanilla and fold in almonds.
  • Pour batter into pan and bake for 23-28 minutes, or until golden.
  • Cool in pan and then cut into pieces. 
  • Dust with icing sugar before serving.